
Struggling with washed-out colors, ink smudging, or inaccurate hues in your DTF printing? As an embroidery pro expanding into DTF, you’re not alone-white ink layering and printhead cleaning issues plague many DTF printer users. This step-by-step guide diagnoses your problems and delivers fixes like RIP calibration and ink optimization for vibrant results. Upgrade from free tools at needlic.com for high quality pro-level quality.
Key Takeaways:
What Are Color Issues in DTF Printing?
Color issues in DTF printing, such as washed-out hues, bleeding edges, or mismatched shades, stem from improper RIP software calibration, poor white ink layering, and incorrect printer settings. These problems often show as ink bleeding, color cast, and ghosting on DTF transfers. They disrupt print quality and affect the final look on fabrics.
Common symptoms include colors running together at the edges of DTF film or PET film, where printer ink fails to stay contained. Image blurring from printhead blockage or excessive ink makes designs look soft and undefined. Ghosting appears as faint shadows, often tied to drying time issues or film defects.
ICC profiles play a key role in matching digital designs to printed output. Without proper ones for DTF inks, color inconsistencies arise between screen previews and actual prints. RIP software handles color conversion from RGB mode to CMYK mode, but mismatches lead to color mismatch.
Diagnosis starts with spotting these signs during the printing process. Factors like printer calibration drift, ink compatibility, and environmental factors contribute. Understanding them sets the stage for targeted fixes in DTF printing.
Common Symptoms of Poor Color Output
Poor color output in DTF printing manifests as ink bleeding where colors run into each other, image blurring from printhead issues, ghosting shadows on DTF transfers, and color cast giving a yellow or blue tint to whites. These issues reduce color accuracy and harm ink adhesion on DTF film. Prints often look dull after heat press film transfer.
Ink bleeding happens along edges, especially with high-humidity environments or excessive ink layers. Colors mix, creating muddy transitions in designs. This ties to poor printer resolution or dpi settings.
- Fading vibrancy in CMYK prints, where bold reds turn pinkish on dark fabrics.
- Ghosting from short drying time, leaving shadow outlines around sharp lines.
- Color cast from mismatched ICC profiles, tinting neutrals unnaturally.
- Uneven printing with streaks from printhead nozzles clogging with white ink.
Users report these in DTF printer communities, often linked to printer maintenance neglect. Spotting them early prevents wasted DTF supplies like DTF film and DTF powder. Visual checks before curing help identify patterns and avoid waste ink bottle issues.
Why Colors Look Washed Out or Inaccurate: Improving color accuracy
Colors appear washed out or inaccurate in DTF printing due to insufficient white ink underbase, RGB-to-CMYK conversion errors in free RIP software, and lack of custom ICC profiles for DTF inks. Think of white ink as the foundation that blocks fabric color bleed-through. Without enough layers, hues lose punch, like paint on a dark wall without primer.
Free RIP tools use generic settings that ignore ink chemistry in water based DTF formulations. This causes color inconsistencies, such as greens shifting to teal. Custom profiles tailored to your DTF printer ensure better matching.
Printer calibration drift over time leads to deviations, much like a misaligned projector fading edges. Printhead cleaning neglect allows dust particles to block flow, weakening output. Overheating or ink leaking worsens this during long runs.
Experts recommend checking printer settings like printer resolution and heat press temperature for consistent results. Poor fabric preparation or film wrinkling amplifies issues and causes uneven printing. Addressing these roots improves print quality DTF transfers.
Quick Diagnosis: Identify Your Specific Color Problem
Quickly pinpoint DTF color problems by running test prints on PET film and comparing against reference color profile swatches to distinguish between fading from under-curing, bleeding from excessive ink, or color mismatch from profile errors. This diagnostic process saves time and prevents wasted DTF supplies like ink and DTF film. Accurate identification ensures targeted fixes for better print quality.
Start with a standard color chart printed on your DTF printer. Compare the output to digital references under consistent lighting. This reveals issues like color inconsistencies or ink bleeding early.
Common culprits include white ink opacity problems or RIP software miscalibration. Testing on DTF film mimics real transfers, highlighting heat press effects. Experts recommend this method to avoid uneven printing and ghosting.
Regular printhead cleaning and printer calibration support diagnosis. Check for environmental factors like high humidity affecting ink adhesion. Quick tests lead to high quality DTF transfers without excess waste.
Is It Fading, Bleeding, or Mismatch?
Differentiate fading (dull prints post-heat press from low white ink), bleeding (colors merging on film from high humidity or poor ink adhesion), and mismatch (screen vs. print deviation from RGB/CMYK issues). Use this decision tree to identify your specific color problem in DTF printing. It guides fixes for color accuracy and print quality.
First, check if colors weaken after transfer. This points to fading from under-cured white ink layers. Boost white layer opacity in printer settings to restore vibrancy.
Next, inspect for smears on wet film. Bleeding often stems from excessive ink or poor drying time. Reduce excessive ink volume and ensure proper printhead nozzles are clear.
Finally, look for gaps between screen preview and print. Color mismatch arises from ICC profile errors or CMYK mode issues. Calibrate RIP software for precise color profiles.
| Symptom | Description | Quick Check | Likely Cause |
|---|---|---|---|
| Fading | Dull colors after heat press | Compare pre- and post-transfer | Low white ink opacity |
| Bleeding | Colors merge on film | Examine wet print for smudges | Excessive ink or humidity |
| Mismatch | Print differs from screen | Test with color chart | RGB/CMYK profile error |
Fix 1: Calibrating RIP Software for Accurate Colors
Calibrating RIP software eliminates most color mismatch inaccuracies by creating custom ICC profile s tailored to your DTF printer’s white ink and CMYK output. Switch from RGB mode to CMYK mode first to match printing realities and reduce color mismatch. This step tackles issues like color cast and uneven printing common in DTF transfers.
Many DTF users notice color inconsistencies from mismatched profiles, especially with white ink layers. Calibration ensures ink compatibility across designs, improving print quality on PET film. Expect better results in high-detail graphics after this fix.
Follow the steps below for profiling, then select the right ICC profile. Total time is under an hour, and it prevents problems like ink bleeding or ghosting. Test on scrap fabric to confirm color accuracy before production runs.
Experts recommend regular printer calibration alongside this, checking for printhead blockage or nozzle checks. Combine with proper drying time settings in your RIP to avoid ink smudging during film transfer.
Step-by-Step RIP Color Profiling
Start RIP color profiling by printing a 21-step grayscale chart on DTF film using your current settings. Load the test chart into the RIP software first, which takes about five minutes. This reveals color profile gaps tied to your DTF printer.
Next, print the chart at 600 DPI on PET film, allowing ten minutes for output. Ensure printer settings match production speed to mimic real jobs. Watch for film wrinkling or excessive ink, which signals printhead blockage issues.
- Load test chart in RIP software (5 mins).
- Print at 600 DPI on PET film (10 mins).
- Measure with spectrophotometer for L*a*b values, using tools like X-Rite i1 (15 mins).
- Generate ICC profile in RIP (15 mins).
Total time is around 30 minutes. A common mistake is skipping nozzle checks, leading to image blurring from printhead clogs. Always clean printhead before starting for even printer resolution.
Choosing ICC Profiles for DTF Inks
Select ICC profiles matching your DTF inks, like Epson-compatible profiles for white ink heavy designs, to ensure color fidelity. Generic options work for basics, but specialized ones boost vibrancy. Test with InkSonic white ink for best ink compatibility results.
Compare profiles based on your setup in Adobe Photoshop or Adobe Illustrator. Generic Adobe ICC is free and simple for starters. It suits light DTF supplies use but lacks punch for bold colors.
DTF-specific AGP profile enhances white ink vibrancy at a small cost. Custom printer-matched profiles offer top accuracy via RIP software. They adapt to your exact printer maintenance history and environmental factors.
| Profile | Ink Type | Accuracy Gain |
|---|---|---|
| Generic Adobe ICC | Standard CMYK | Basic match |
| DTF-specific AGP | White + CMYK | Vibrant whites |
| Custom printer-matched | DTF-specific | Optimal fidelity |
Print test designs on DTF film, then press with heat press at standard temperatures. Check for color accuracy on fabric, avoiding dust particles or printer overheating. Update profiles if ink quality changes.
Fix 2: Check and Adjust Ink Quality and Mixing
Subpar ink quality often leads to color shifts in DTF printing. Poor ink can cause washed-out whites and dull colors across the print. Test and remix for optimal viscosity to restore vibrancy.
Ink’s role in color fidelity is crucial since it directly affects pigment dispersion and adhesion on DTF film. Low-quality or old ink leads to symptoms like color mismatch and uneven printing. Fresh, well-mixed ink ensures sharp print quality on various fabrics.
Check for ink separation or clumping, which causes printhead blockage and ink bleeding. Regular printer maintenance with quality DTF supplies prevents these issues. Adjust printer settings after testing to match your RIP software.
Experts recommend monitoring environmental factors like temperature, as they impact ink compatibility. Proper mixing restores color accuracy, reducing ghosting in DTF transfers. This step improves overall results before heat press application.
Testing Ink Viscosity and Freshness
Test ink viscosity by timing flow from syringe: fresh DTF ink should drip steadily at room temperature. Use a 10ml syringe for this check on white ink and CMYK channels. This simple test reveals issues affecting color consistency.
Follow these steps to verify freshness and quality:
- Shake white ink cartridge for 30 seconds to mix pigments.
- Measure viscosity with a 10ml syringe, aiming for smooth flow without delays.
- Check expiration date and discard ink over six months old.
- Remix separated ink by stirring for two minutes until uniform.
Avoid the common mistake of using clumped ink, which causes printhead nozzles blockages and image blurring. Clean printhead immediately if flow is irregular. This ensures reliable drying time and ink adhesion.
Regular testing ties into printer calibration for better DPI settings and printer resolution. Fresh ink prevents film wrinkling and supports high-quality DTF powder adhesion during transfer.
Proper White Ink Layering for Vibrancy
Layer white ink at increased density under CMYK for DTF prints to boost color pop on dark fabrics. This technique enhances opacity and prevents color cast. Set parameters in your RIP software for best results.
Use these steps for effective white ink layering:
- Adjust white channel to higher density in RIP software, such as 130%.
- Print white layer first, followed by color channels.
- Verify opacity on test film before full runs.
For example, layering boosts reds and blues on black tees, making them stand out vividly after heat press temperature curing. This counters ink smudging and excessive ink issues. It also improves film transfer without dust particles interference.
Match color profile or ICC profile in CMYK mode, avoiding RGB mode mismatches. Proper layering reduces color inconsistencies and printer overheating from heavy deposits. Combine with fabric preparation for durable, vibrant DTF transfers.
Fix 3: Optimize Printer Settings for Color Fidelity
Fine-tune DTF printer settings like DPI and nozzle patterns to cut color inconsistencies. Adjust printhead nozzles and resolution for better color fidelity in DTF printing. These tweaks reduce issues like color mismatch and uneven printing.
Start by checking your printer driver for custom options. Set higher DPI to improve print quality on DTF film. This helps with ink adhesion and prevents image blurring.
Run printer calibration routines daily to maintain color accuracy. Monitor white ink flow, as blockages often cause ghosting or streaky colors. Combine with proper drying time to avoid ink smudging.
Test prints on small DTF transfers to verify settings. Adjust for environmental factors like humidity, which affect ink compatibility. These steps ensure high quality results before full production.
Resolution and DPI Adjustments
Set DTF printer to 720×1440 DPI for sharp colors, avoiding 300 DPI which causes pixelation in fine gradients. Higher DPI settings enhance printer resolution for detailed DTF printing. This fixes color cast in gradients.
Access the printer driver software first. Choose custom DPI settings suited for PET film. Turn off bidirectional printing for better color accuracy, especially in Jacksonville Fl humid conditions.
- Open printer preferences and select custom DPI mode.
- Input 720×1440 DPI specifically for DTF film.
- Print a 1×1 inch color block to test sharpness.
- Disable bidirectional mode if colors shift.
These changes take about 5 minutes and prevent film wrinkling from poor printer resolution. Re-test after adjustments to confirm print quality on fabrics via heat press.
Head Cleaning and Nozzle Checks
Run nozzle check: Perfect pattern shows no gaps in white ink or CMYK channels, preventing streaky colors. Regular printhead cleaning maintains printhead nozzles. This avoids printhead blockage in DTF printing.
Print a nozzle pattern daily to spot issues early. Clean if five or more nozzles miss. Use water based solution for safe printer maintenance.
- Print nozzle pattern, which takes 2 minutes.
- Inspect for gaps in CMYK mode or white ink.
- Run power clean cycle if needed, using 10 minutes of ink.
- Empty waste ink bottle to prevent overflows.
Blockages lead to ink bleeding and poor color fidelity. After cleaning, verify with a test print on DTF supplies. Pair with ICC profile in RIP software for optimal results.
How Does Film Preparation Affect DTF Colors?
Improper DTF film prep like dust particles or wrinkling alters ink adhesion, leading to color deviation during DTF transfers. Clean PET film ensures even ink spread and prevents spots from static dust. This step sets the foundation for accurate DTF printing results.
Dust on the film traps air bubbles under the ink, causing color inconsistencies and uneven printing. Wrinkled DTF film leads to poor ink adhesion, resulting in ink smudging or ghosting after the heat press. Always inspect film for defects before use.
Static buildup attracts more dust particles, worsening film wrinkling and print quality. Use an anti-static brush or compressed air for cleaning. Proper prep reduces color mismatch in DTF transfers.
To fix these issues, store film in a dust-free environment and handle with gloves. This preparation improves ink compatibility and overall color accuracy. Next, explore printing adjustments for better results.
Fix 4: Master the Printing Process on Transfer Film
Master film printing with precise curing to lock in colors before powder application. This step ensures water-based inks dry evenly on DTF film, preventing color inconsistencies and ink bleeding during later stages. Proper curing preserves color accuracy for high-quality DTF transfers.
Start by checking your printer settings for optimal DPI and ink flow. Use RIP software to match CMYK mode with your DTF printer’s color profile. These adjustments reduce color mismatch from the start.
After printing, handle the film carefully to avoid dust particles or scratches that cause uneven printing. Cool the film briefly before applying DTF powder. This process links directly to better ink adhesion and vibrant results on fabrics.
Experts recommend testing small batches to fine-tune drying time based on your environment. Consistent curing minimizes film wrinkling and supports reliable print quality in DTF printing workflows.
Correct Curing Temperature and Time
Cure DTF prints at 60-70 degreesC for 2-3 minutes to set water-based inks without bubbling. Preheat the film for about 1 minute to prepare the surface using InkSonic or Cheetah DTF ovens. Then dry it on a conveyor at around 65 degreesC for 2.5 minutes.
Allow the film to cool for 30 seconds before powder application. This sequence prevents ink smudging and ensures strong ink adhesion. It helps maintain color vibrancy through the DTF transfer process.
Monitor your heat press temperature alignment with curing settings for end-to-end consistency. Use a thermometer to verify oven temps. Practical tests on scrap film confirm even drying without hotspots.
Adjust for environmental factors like humidity, which can extend needed drying time. Clean printheads regularly to avoid printhead blockage that affects initial ink laydown. These steps lead to sharper images and reduced color cast.
Avoiding Over- or Under-Curing
Over-curing above 80 degreesC warps DTF film causing wrinkles; under-curing leaves tacky ink prone to smudging. Recognize over-curing by bubbles on the surface and film distortion. Under-curing shows as sticky residue when touched.
| Issue | Signs | Fix |
|---|---|---|
| Over-curing | Bubbles, warped film | Lower temperature, shorten time |
| Under-curing | Sticky ink, smudging | Extend time by 30 seconds, increase to 65-70 degreesC |
Test cured film by touching; it should feel dry within 3 minutes. This simple check catches issues early in your DTF printing routine. It prevents ghosting or image blurring in final transfers.
For over-curing fixes, drop the temp gradually and watch for smooth results. Under-cured prints benefit from precise timer use. Integrate printer maintenance like printhead cleaning to support curing success and avoid excessive ink buildup with DTF powder.
Fix 5: Perfect Heat Press Settings for True Colors
Optimal heat press settings preserve DTF colors by ensuring full ink-film-fabric bond. The heat press plays a key role in DTF printing, as it activates the adhesive on the DTF film and secures ink adhesion to the fabric. Without precise control, issues like color mismatch or poor print quality arise from weak bonds.
Experts recommend testing settings on scrap fabric first to avoid color inconsistencies. The press must apply even pressure and consistent heat press temperature to prevent film wrinkling or ghosting. This step fixes many problems from earlier fixes like printhead cleaning or printer calibration.
A well-calibrated heat press ensures color accuracy across various fabrics, reducing ink bleeding and enhancing overall DTF transfers. It complements proper fabric preparation and dtf powder application for high quality results. Tease ahead for a detailed temperature, pressure, and time guide.
Common errors include overheating, which causes image blurring, or insufficient time leading to peeling issues. Adjust based on your dtf printer output and ink quality for best outcomes. Proper settings minimize environmental factors like humidity affecting the bond.
Temperature, Pressure, and Time Guide
Press at 160 degreesC, 4-5 PSI, 12-15 seconds for polyester; 175 degreesC for cotton. These settings promote strong ink adhesion in DTF printing and prevent color cast. Always peel hot to avoid cooling-related defects.
| Fabric | Temperature | Pressure | Time |
|---|---|---|---|
| Cotton | 175 degreesC | 5 PSI | 15 seconds |
| Polyester | 160 degreesC | 4 PSI | 12 seconds |
Use this guide as a starting point, then tweak for your dtf supplies and DTF printer resolution. For blends, average the values and test. This approach fixes uneven printing from mismatched heat press parameters.
Monitor your press for consistent performance to maintain color accuracy. Pair with RIP software adjustments like CMYK mode for true colors. Avoid printer overheating by not exceeding recommended temps.
Pre-Press Techniques for Even Transfer
Pre-press fabric 5 seconds at 150 degreesC to remove moisture, ensuring uniform color transfer. This step in fabric preparation prevents ghosting and film defects during DTF printing. It creates a flat surface for better dtf film alignment.
- Pre-press fabric for 5 seconds at 150 degreesC.
- Align the DTF transfer precisely on the fabric using PET film.
- Apply full press for 15 seconds at fabric-specific settings.
- Peel film when cooled to 50 degreesC for clean release.
Follow these steps to eliminate dust particles and wrinkles that cause ink smudging. Test on samples to refine for your water based inks and dtf powder. This technique boosts print quality significantly.
Incorporate printer maintenance like checking printhead nozzles before pressing. It addresses excessive ink issues from prior stages. Consistent pre-pressing leads to vibrant, lasting color profile results without film wrinkling.
Material Matching: Why Fabric Type Matters for Colors
Fabric type shifts DTF colors: Cotton absorbs more white ink, polyester reflects brighter hues. This difference affects color accuracy in DTF printing. Matching materials to printer settings prevents color mismatch.
Cotton pulls ink deeper, creating a matte finish that softens vibrancy. Polyester, being synthetic, bounces light for a glossy look. Experts recommend testing DTF transfers on sample fabrics first.
Without proper fabric preparation, issues like dye migration arise on polyester. Cotton demands more white ink underlay for bold prints. Adjust heat press temperature based on fabric to ensure ink adhesion.
Use ICC profile s tailored to each material in your RIP software. This step boosts print quality and avoids color cast. Always check environmental factors like humidity affecting drying time.
Color Behavior on Cotton vs. Polyester
Cotton dulls colors without extra white ink layer; polyester enhances vibrancy but risks dye migration. These behaviors demand specific printer calibration tweaks. Compare them side-by-side for better color consistency.
| Cotton | Polyester | |
|---|---|---|
| White Ink Layer | Thicker underlay for opacity | Thinner layer to avoid buildup |
| Finish | Matte, absorbed look | Glossy, reflective shine |
| Heat Press Settings | Higher temp for penetration | Lower temp to prevent melting |
| Common Issue | Uneven printing if under-inked | Ink bleeding from migration |
Test swatches per fabric using your DTF printer. Print the same design in CMYK mode on both. Note shifts in color accuracy to refine ICC profiles.
For cotton, boost white ink in RIP software to counter absorption. Polyester prints shine with reduced dpi settings for less excessive ink. Monitor printhead nozzles to avoid printhead blockage.
Advanced Fix: Use Professional RIP Software
Professional RIP software like InkSonic or Cheetah DTF auto-generates ICC profiles, addressing color mismatch in DTF printing. These tools create custom profiles for your DTF printer, ensuring color accuracy across different inks and films. Unlike basic editors, they handle white ink layering precisely.
Start by installing the software and inputting your printer settings, such as DPI settings and ink compatibility. Run a calibration test print on DTF film to generate the profile. This fixes issues like color cast or uneven printing from poor color profiles.
Compared to free tools, pro RIP software offers auto-calibration for printhead nozzles and printer calibration. It reduces errors from switching between CMYK mode and RGB mode. Expect better print quality for DTF transfers on various fabrics.
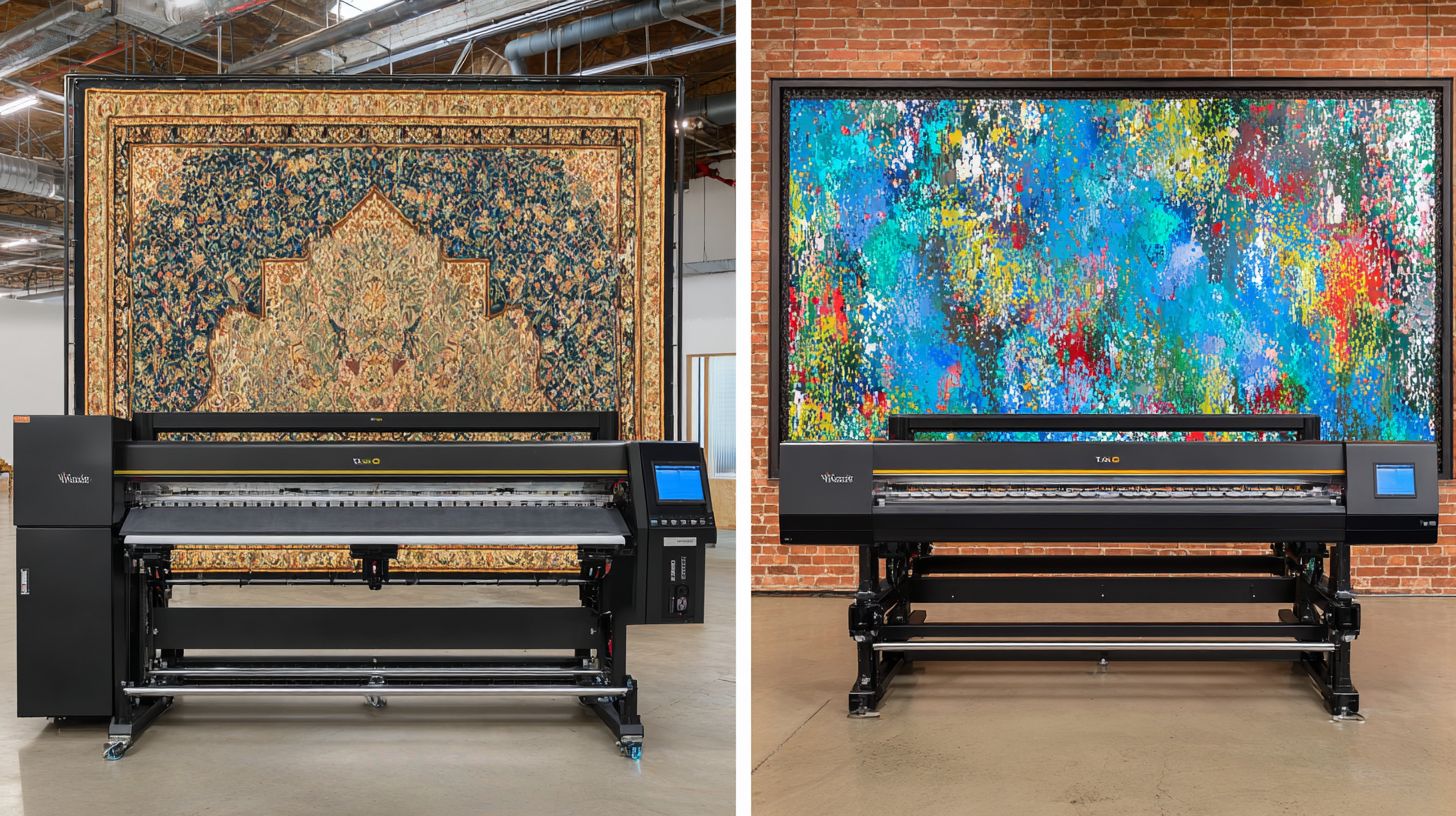
For example, print a color chart before and after using the ICC profile to see improvements in skin tones or vibrant reds. Maintain the profile with regular printer maintenance, like printhead cleaning, to avoid ghosting or ink bleeding.
Benefits Over Free Tools
Pro RIP cuts setup time compared to free tools lacking DTF-specific profiles. Tools like Adobe Photoshop RIP rely on basic CMYK handling, leading to color inconsistencies. Professional options provide tailored solutions for DTF supplies.
| Feature | Free Tools (e.g., Photoshop RIP) | Pro Tools (e.g., Cheetah DTF) |
|---|---|---|
| Color Management | Basic CMYK, high color errors | Auto-calibration, high color accuracy |
| Profile Generation | Manual, no DTF support | Auto-generates ICC profiles |
| White Ink Handling | Prone to image blurring | Precise layering for white ink |
| Setup Efficiency | Time-consuming tweaks | Streamlined for printer resolution |
Switching to pro software saves hours weekly on fixes like excessive ink or ink smudging. It ensures consistent ink adhesion during heat press application, perfect for shops in Jacksonville Fl. Free tools often ignore environmental factors like humidity affecting drying time.
Test with a sample design on cotton fabric to compare film wrinkling or film defects. Pro RIP integrates printer ink and DTF powder settings for optimal film transfer. This leads to reliable high quality results without constant heat press temperature adjustments.
Troubleshooting Persistent Color Problems
Persistent issues often trace to overlooked factors like high humidity diluting inks. When basic fixes fail in dtf printing, advanced troubleshooting targets environmental controls and calibration drifts. Experts recommend systematic checks to restore color accuracy.
Start by auditing your workspace for environmental factors such as temperature and dust. Test print swatches regularly to spot color inconsistencies early. Adjust printer settings like DPI and ICC profiles for consistent results.
Common culprits include ink compatibility mismatches or printhead blockage. Recalibrate the dtf printer after ink changes to prevent color mismatch. These steps ensure high quality dtf transfers without ghosting or bleeding.
For ongoing problems, verify white ink flow and drying time. Maintain a log of heat press temperature and fabric preparation. This approach minimizes PET film wrinkling and boosts ink adhesion.
Environmental Factors Like Humidity
Maintain 40-60% humidity; above causes ink bleeding, below leads to static film defects. High moisture dilutes printer ink, resulting in color cast and uneven DTF printing. Control this to improve print quality in DTF printing.
Use a dehumidifier to keep relative humidity under 60%. Set air conditioning to 22 degreesC to prevent printer overheating and ink leaking. Create a dust-free zone to avoid dust particles causing image blurring.
- Install a dehumidifier and monitor with a hygrometer for steady levels.
- Run AC consistently at 22 degreesC to stabilize the dtf printer environment.
- Seal the print area with covers and use air filters against dust particles.
These measures reduce film defects and excessive ink issues. Combine with printer maintenance routines like printhead cleaning. Results show clearer dtf film and better color profiles.
When to Test Print Swatches
Print swatches weekly or after ink changes to catch drifts early. This practice reveals color inconsistencies before they affect production runs. Use them to fine-tune RIP software and CMYK mode settings.
Follow these steps for effective testing:
- Print a Pantone 1000XC chart on DTF film under standard conditions.
- Compare colors using a spectrophotometer for DeltaE values under 2 tolerance.
- Recalibrate if values exceed 3, adjusting ICC profile and printer resolution.
Schedule tests after installing new dtf supplies or changing printer ink. Check for white ink issues or printhead nozzles clogs. This prevents ghosting and ensures ink quality.
Track results in a log alongside dpi settings and heat press temps. Retest post-calibration to confirm color accuracy. Consistent swatch checks maintain high quality dtf transfers without ink smudging.
Prevent Future Color Issues in DTF Workflow
A standardized workflow prevents recurring color problems through routine checks. Focus on consistent printer maintenance and ICC profile verification to maintain color accuracy in DTF printing. This approach minimizes issues like color mismatch and color cast in DTF transfers.
Experts recommend daily habits that address printhead blockage and ink compatibility. Regularly check printer settings and DPI settings to avoid uneven printing or ghosting. Proper film storage prevents film wrinkling and defects.
Incorporate RIP software calibration for CMYK mode over RGB mode to ensure high quality DTF transfers. Monitor environmental factors like humidity, which affect drying time and ink adhesion. These steps lead to reliable print quality.
For best results, log every print run with notes on heat press temperature and white ink flow. This helps spot patterns in ink bleeding or image blurring. Consistent practices build long-term success in your DTF workflow.
Daily Maintenance Checklist
Daily checklist: Nozzle check, waste ink empty, film storage verification. These quick tasks prevent printhead nozzles from clogging and ensure smooth DTF printer operation. Start each session with a nozzle print that takes just two minutes.
Perform a nozzle print every morning to detect printhead blockage early. Empty waste ink to avoid overflows that cause ink leaking and color inconsistencies. Verify DTF film is flat and dust-free to prevent dust particles from ruining prints.
- Run nozzle print for 2 minutes to check printhead nozzles and catch white ink issues.
- Clean print heads weekly with approved solutions to remove excessive ink buildup.
- Shake inks before use to maintain ink quality and prevent ink smudging.
- Log printer settings like printer resolution and ICC profile for each job.
- Print a test swatch monthly to verify color accuracy and printer calibration.
Follow this list to reduce film defects and printer overheating. It promotes even ink adhesion during heat press application. Adjust for water based inks by monitoring DTF powder compatibility.
Upgrade to Premium Software for Flawless DTF Colors
Upgrade from free tools like Adobe Photoshop and Adobe Illustrator to premium Cheetah DTF RIP software for automated ICC profile s and 5x faster color-accurate DTF printing. Free alternatives often struggle with color inconsistencies and color mismatch in DTF transfers. Premium options handle CMYK mode and RGB mode conversions smoothly for better results.
Switching delivers three key gains: flawless colors through precise ICC profiles, 50% time savings on processing prints, and pro support for troubleshooting issues like ink bleeding or color cast. For example, when printing on DTF film, premium software adjusts printer settings automatically to prevent uneven printing. This leads to higher print quality without manual tweaks.
Free tools lack advanced features for printer calibration and color accuracy, causing problems like ghosting or image blurring during film transfer. Premium RIP software integrates with your DTF printer for optimal dpi settings and ink compatibility. Urge an upgrade for better quality and faster results over free alternatives.
Experts recommend premium InkSonic software to manage white ink layers and printer resolution effectively. It reduces printhead blockage risks by optimizing excessive ink output. Test it on a sample design to see sharper DTF supplies integration and consistent heat press outcomes in Jacksonville Fl.
🚀 Upgrade Your Embroidery Workflow
Stop wasting time with low-quality tools. Use professional software for faster and better results.