
Struggling to transform your JPG image into a professional embroidery file like DST or PES? Beginners often face blurry stitches or poor digitization-until now.
This step-by-step guide covers preparing your image in Inkscape with Ink/Stitch, converting to vector paths in SewArt, and using Wilcom Hatch or PE Design for flawless results.
Avoid common pitfalls and preview our top software picks for stunning embroidery.
Key Takeaways:
- Prepare your JPG by simplifying colors, increasing contrast, and resizing for optimal embroidery digitizing before importing into software like Wilcom Hatch.
- Use professional tools like PE Design to auto-trace the image, assign stitch types (satin/run), set density, and preview for realistic results.
- Avoid low-quality images and poor stitch settings; export to formats like DST or PES, and choose high-end software for flawless conversions.
1. Understanding JPG Files
JPG files store raster images as compressed pixel grids, making them perfect for photos but challenging for embroidery digitizing.
Each image consists of a grid of pixels, tiny colored squares that define details like shading and gradients. Unlike vector images made of scalable paths, raster formats lose quality when resized, which matters for embroidery designs that scale to hoop sizes.
Compression artifacts in JPGs create blocky edges or blurred areas, especially in high-detail photos. These issues distort stitches in embroidery, leading to uneven paths or excessive thread breaks during stitching.
1.1 Pixels vs Vectors in Embroidery
Raster pixels work well for printing photos but fail in embroidery software like Inkscape with Ink/Stitch. Vectors use Bezier curves and paths that define clean shapes, ideal for converting to satin stitches or fill stitches.
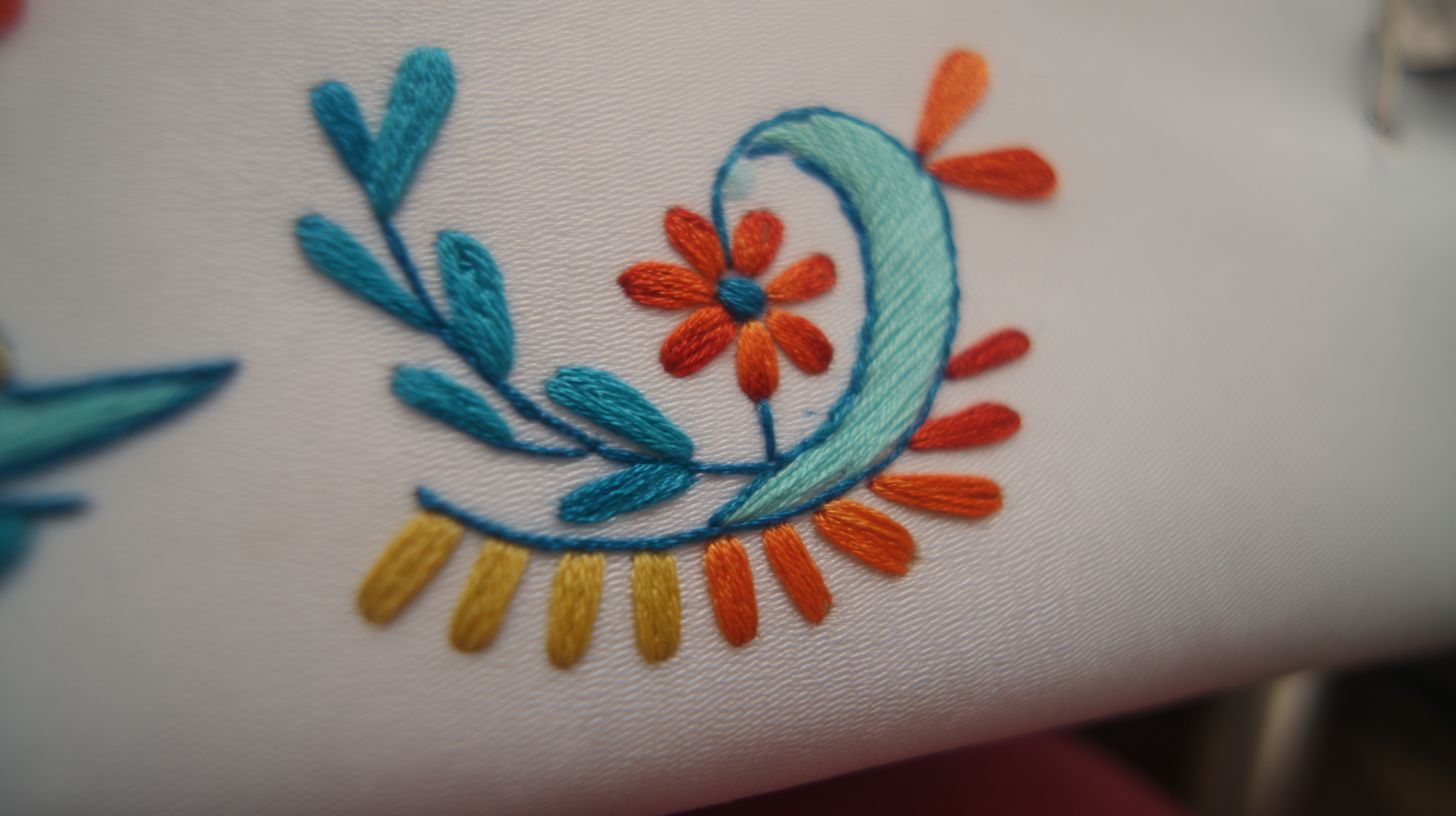
For example, a pixel-based flower photo blurs at large hoop sizes, while a vector version keeps sharp stroke stitches. This difference ensures precise stitch order and reduces digitizing errors.
Embroidery machines read vector-based SVG or formats like PES and DST, not raw pixels. Start with raster-to-vector conversion to build scalable objects.
1.2 Compression Artifacts and Their Impact
JPG compression saves space by discarding fine details, causing artifacts like halos around edges. In embroidery, these translate to jagged running stitches or dense fills that waste thread.
A photo of a logo might show pixelation in curves, complicating node editor adjustments. Clean up artifacts early to avoid issues in the preview panel.
Experts recommend opening JPGs in Inkscape for inspection before tracing. This step prevents distorted paths in the final embroidery file.
1.3 Why Raster-to-Vector Conversion is Essential
Directly stitching from raster JPGs ignores how machines interpret layers and colors. Trace bitmap tools convert pixels to vectors, creating editable objects panel entries.
For instance, trace a JPG bird image to get paths for satin stitches on wings and fill stitches for the body. Simplify paths to optimize stitch density and hoop fit.
Use Ink/Stitch extensions for auto or manual conversion, then tweak in the path effects menu. Export as SVG first, then to machine formats for a test run.
Exploring Embroidery File Formats
What if your embroidery machine couldn’t read your design? That’s why DST, PES, and EXP formats exist as machine-specific stitch instructions. Each format translates vector paths and image designs into precise stitches like running, satin, or fill.
Understanding these formats helps you choose the right one during export from software like Inkscape with Ink/Stitch. For example, a Brother machine needs PES or EXP, while Tajima uses DST. This ensures your SVG paths convert smoothly to embroidery files without errors.
Key differences lie in stitch types supported and brand compatibility. PES handles complex satin stitches and multi-layer designs well. Always check your machine’s manual for the best format match.
Below is a comparison table to guide your selection. Use it to map your embroidery software export options to specific machines before finalizing a test run.
| Format | Primary Brands | Stitch Types Supported | Compatibility Notes |
|---|---|---|---|
| DST (Tajima) | Tajima, Barudan, Happy, Janome (some models) | Running stitch, satin stitch, fill stitch, zig-zag | Universal format, widely supported. Ideal for commercial machines. Exports well from Ink/Stitch as vector-based paths. |
| PES (Brother) | Brother, Babylock (older models) | Running stitch, satin stitch, fill stitch, applique, bean stitch | Brother-specific with hoop size info. Supports multi-color designs and density settings. Use for home Brother machines. |
| EXP (Brother/Babylock) | Brother (newer), Babylock (recent models) | Running stitch, satin stitch, fill stitch, cross-stitch, tatami fill | Enhanced PES variant with better stitch order and preview. Handles complex bezier curves from SVG tracing. |
This table simplifies picking the right export format. For instance, convert a traced bitmap image to SVG paths in Inkscape, then use the objects panel to assign stroke or fill stitches before exporting to PES.
3. Preparing Your JPG Image
Start by cleaning your JPG image using remove.bg to remove backgrounds and sharpen edges in GIMP before importing. This ensures your photo of a flower becomes a clean vector image ready for embroidery software like Inkscape with Ink/Stitch. Proper prep prevents issues with stitches and paths later.
Focus on these five essential prep steps for quick wins. Each step simplifies the trace bitmap process and improves embroidery file quality. Use free tools to handle background removal, adjustments, and more.
- Remove the background with remove.bg for a transparent base. This isolates your design, like a logo, avoiding extra fill stitches in unwanted areas.
- Adjust contrast in GIMP to make edges sharp. Boost brightness on a family crest so tracing captures fine details accurately.
- Resize properly to fit your embroidery hoop size. Scale a butterfly outline to 4×4 inches to match common PES or DST formats.
- Preview with trace bitmap in Inkscape. Test auto-tracing on your cleaned image to check paths and Bezier curves before committing.
- Save as PNG with transparency. This format preserves quality for import into Ink/Stitch, setting up satin stitches and running stitches perfectly.
After these steps, your image is optimized for conversion. Import the PNG into Inkscape to access the objects panel and node editor. This prep reduces manual tweaks in stitch order and path effects.
Choosing the Right Software
Inkscape with Ink/Stitch offers free vector conversion while Wilcom Hatch delivers professional results, but which fits your skill level?
Beginners benefit from Inkscape’s simple tools to trace images into SVG paths. Intermediate users find Embrilliance intuitive for adding fill stitches and satin stitches. Pros rely on Wilcom for precise stitch order control.
Evaluate software based on your needs like cost, learning curve, output quality, and format support. The table below compares options by user level with real-world examples.
| Software | User Level | Cost | Learning Curve | Output Quality | Format Support |
|---|---|---|---|---|---|
| Inkscape + Ink/Stitch | Beginner | Free | Easy | Good for basics | PES, DST, SVG |
| Embrilliance | Intermediate | Affordable subscription | Moderate | High with previews | PES, DST, JEF, VP3 |
| Wilcom Hatch | Pro | Premium one-time purchase | Steep | Professional grade | All major formats |
Beginner: Inkscape with Ink/Stitch
Inkscape paired with Ink/Stitch extension turns JPG images into embroidery files at no cost. Use trace bitmap to create paths from photos, then apply running stitch or fill stitches.
Access the objects panel to select layers and adjust stroke settings. The node editor simplifies bezier curves for clean designs. Preview stitches before exporting to PES or DST.
For a logo, trace the outline, set density low, and simplify paths. This free tool suits hobbyists testing hoop sizes without complexity.
Experts recommend starting here to learn vector basics before paid options.
Intermediate: Embrilliance
Embrilliance offers a user-friendly panel for auto and manual adjustments to embroidery designs. Convert images via vector tools, then edit colors and stitch order.
Use the path effects for satin stitches on text, and layer objects for multi-part designs. Simulate a test run to check hoop fit and density.
Ideal for custom t-shirt graphics, it supports wide format output like JEF. The moderate curve builds on free tools for better output quality.
Many users upgrade here for reliable preview features and export options.
Pro: Wilcom Hatch
Wilcom Hatch provides advanced control over every stitch in complex designs. Professionals use its tools to refine node positions and optimize stitch order for production.
Import JPGs, apply stroke stitches or fill patterns, and adjust colors per thread. The software handles large hoop sizes with precise density settings.
For apparel runs, resequence paths to minimize jumps and ensure durability. It excels in format compatibility across machines.
This choice fits those needing professional results with a steeper learning curve.
5. Installing Embroidery Software
Download Inkscape from official site, run the installer, and enable Ink/Stitch extension. You’re ready in 10 minutes. This free setup converts JPG images to embroidery files like PES or DST.
For Windows users, double-click the EXE file after download. Follow the setup wizard, select standard options, and restart your computer if prompted. The Ink/Stitch extension installs via the Extensions menu under the main toolbar.
Mac users drag the app to Applications folder post-download. Open Terminal and run sudo apt install inkscape if needed for extensions, then enable Ink/Stitch from Preferences. Screenshot shows the Extensions panel with Ink/Stitch listed and activated.
Verify installation by opening Inkscape, loading a test SVG file, and checking the Path Effects for stitch options like running stitch or satin stitches. This prepares you for vector tracing and stitch preview.
Activating Ink/Stitch Extension
Launch Inkscape and navigate to Extensions > Manage Extensions. Search for Ink/Stitch, install if missing, and enable it. Screenshot depicts the activation dialog with a green checkmark on success.
Restart Inkscape to load the Ink/Stitch panel on the right side. It includes tools for fill stitches, stroke stitches, and stitch order. Test by selecting a path and applying a satin stitch effect.
Adjust settings in the Objects panel for layer management and node editing. Use the Bezier curves tool to refine designs before exporting to embroidery format.
Wilcom Trial Installation
Download the Wilcom trial from their site for advanced embroidery design. Run the installer on Windows, accept terms, and choose a trial folder. Screenshot shows progress bar at 100% with software launch option.
Launch Wilcom, register for trial access, and explore auto-digitizing for JPG to vector paths. Set hoop size and colors in the workspace for precise stitch density.
Test with a simple flower image, apply fill stitches, and preview in 3D mode. Export as DST for machine compatibility after trial setup.
PE-Design USB Driver Setup
Obtain the PE-Design USB driver from Brother’s support page matching your model. Install via Device Manager on Windows by right-clicking USB ports and updating drivers. Screenshot illustrates driver selection in the hardware list.
For Mac, use System Preferences > Printers & Scanners to add the USB embroidery device. Connect your machine, confirm recognition, and transfer PES files directly.
Run a test run with a basic running stitch design to verify setup. Adjust stitch order in software if paths overlap during preview.
6. Importing Your JPG Image
Imagine dragging your prepared logo into Inkscape’s canvas, instantly ready for vectorization with one click. As a first-time user, you might stare at the blank screen, unsure how to get your family crest JPG inside the software. This common struggle ends with simple import methods that place your image right where you need it for embroidery design work.
Start with the classic approach: go to File > Import. Select your JPG file, and Inkscape loads it onto a new layer. Beginners often miss this, but it keeps your original image separate from future paths and strokes.
For speed, try the drag-and-drop method. Just pull the JPG from your folder onto the canvas. It snaps in place, letting you skip menus and jump straight to trace bitmap for converting to SVG paths.
Once imported, check the import resolution in the dialog box. Set it to match your hoop size, around 300 DPI for crisp stitches. Position the image on its layer, lock it if needed, and you’re set for Ink/Stitch processing into PES or DST formats.
7. Adjusting Image Settings
Before vectorizing, boost your JPG’s contrast by 30 and reduce colors to 8-12 for cleaner embroidery paths. These changes help Inkscape and Ink/Stitch create precise paths from your image. Start in the image editor to avoid issues during trace bitmap.
Increase brightness by 20 first to lighten dark areas. This makes details pop without washing out the design. Use the adjustments panel for quick sliders.
Apply the despeckle filter to remove noise from scanned JPGs. It smooths tiny spots that could fragment into extra stitches. Preview changes before saving as SVG.
- Color quantization: Limit to 8-16 colors to match embroidery thread limits and simplify fill stitches.
- Lock background layer: Prevents accidental edits during node editing.
- Ungroup objects: Allows individual tweaks to bezier curves in the objects panel.
These expert tips ensure your vector converts smoothly to PES or DST formats. Test with a preview in Ink/Stitch to check stitch order and hoop fit.
Brightness and Contrast Tweaks
Raise brightness +20 to reveal hidden details in shadowy JPG areas. Then add contrast +30 to sharpen edges for better path tracing. This combo prepares the image for accurate vectorization in Inkscape.
Avoid overdoing it, as extreme settings create harsh lines unfit for satin stitches. Use the tools panel histogram to monitor changes. Save a copy before proceeding to Ink/Stitch.
For a floral design, these adjustments make petals distinct, reducing running stitch overlaps. Experts recommend previewing in the stitch simulator after tweaks.
Despeckle and Color Quantization
Run the despeckle filter to eliminate speckles from low-quality JPGs. This cleans up the image for smoother trace bitmap results in vector software. Focus on radius settings around 1-2 pixels.
Set color quantization to 8-16 to mimic real embroidery colors. Fewer hues mean simpler stroke stitches and faster export. Adjust in the color panel before saving.
In practice, a photo of a logo benefits from this, turning noisy pixels into clean paths. Check density in Ink/Stitch afterward for optimal stitches.
Layer and Object Management
Lock the background layer to protect your original JPG during edits. This keeps the base intact while you refine foreground objects. Access it via the layers panel.
Ungroup objects post-tracing to edit individual elements like text or shapes. Use the node editor for precise simplify path adjustments. Reorder in the objects panel for logical stitch order.
For complex designs, this prevents merged fill areas from causing stitch knots. Run a test run in embroidery software to verify path effects.
8. Converting to Vector Paths
Select your JPG, Path > Trace Bitmap, choose Colors mode with 8 scans and watch paths magically appear. This Inkscape workflow turns raster images into clean vector paths ideal for embroidery designs. Open your image in Inkscape first for best results.
In the Trace Bitmap panel, set Brightness cutoff to 0.45 and Scans to 8 with Stack scans checked. Adjust these for sharp edges on simple shapes like flowers or logos. Click Update to preview the tracing before finalizing.
After tracing, select the new vector objects and go to Path > Simplify three times. This reduces nodes for smoother bezier curves without losing detail. Use the Node editor to manually tweak curves and close any open paths.
Once paths are ready, save as SVG for Ink/Stitch import. These vector paths ensure precise stitches in formats like PES or DST. Test the stitch order in preview mode next.
Assigning Stitch Types
Fill for large areas, satin for letters, running for outlines. Assign these via the Ink/Stitch Params panel in Inkscape with the Ink/Stitch extension. This step ensures your vector paths translate into appropriate stitches for the embroidery machine.
Select an object in the Objects panel, then open the Params panel to choose stitch types. For shapes wider than one inch, use fill stitches to cover areas evenly. Preview density settings to avoid puckering on fabric.
Visual decision tree: If the path is text under one inch wide, pick satin stitches for smooth, shiny edges like on “Hello World” lettering. Outlines get running stitches for clean borders without bulk. Decorative elements use stroke stitches.
- Fill: Large shapes like flowers or backgrounds, adjust density to 5-7 lines per mm.
- Satin: Narrow text or columns, set underfill for stability.
- Running: Simple outlines on paths, low density for detail.
- Stroke: Patterns like swirls, vary width for effect.
Test the preview in the panel to check stitch order and simulate the design. Fine-tune in the node editor if beziers need simplification before exporting to PES or DST format.
10. Setting Stitch Density
Wrong density ruins designs. Use 5-7mm for fill, 0.4-0.6mm for satin columns per source best practices. Higher density does not mean better quality.
The myth that more density equals better leads to puckering and thread breaks. Proper stitch density balances coverage and fabric stretch. In Ink/Stitch, adjust these in the fill stitches or satin stitches panels.
Pull compensation counters fabric distortion from stitch tension. Add 0.1-0.3mm extra width to satin columns. Test on scrap fabric before full runs.
Hoop size impacts density too. Larger hoops reduce tension, so lower density slightly for big designs. Preview in software to check stitch order and coverage.
Exact Settings by Stitch Type

Match density settings to stitch type for clean results. Use the table below as a starting point in Ink/Stitch. Always preview and test.
| Stitch Type | Recommended Density | Use Case |
|---|---|---|
| Fill Stitches | 5-7mm | Large areas like backgrounds or shapes |
| Satin Stitches | 0.4-0.6mm | Narrow columns, letters, borders |
| Running Stitch | 2-4mm | Outlines, underlays |
| Stem Stitch | 1-2mm | Curved paths, decorative lines |
Import your SVG paths into Inkscape, select objects in the objects panel. Apply via path effects for stroke stitches or fill.
Myth-Busting: Density Myths
Many think cranking up stitch density improves designs. This causes fabric pull and excess thread use. Experts recommend balanced settings over max density.
For thick fabrics like denim, increase spacing to 6-8mm in fill stitches. Thin fabrics like silk need tighter satin at 0.4mm. Adjust in the node editor for bezier curves.
Simulation in software debunks over-density. Run a test run to see puckering early. Proper density keeps embroidery files in PES or DST formats stitch-efficient.
Pull Compensation and Hoop Size
Enable pull compensation in Ink/Stitch for satin columns. Set to 10-20% of column width. It zigzags stitches outward to fight inward pull.
Larger hoops stretch fabric less, so drop fill density by 1mm. Small hoops need tighter settings to avoid gaps. Factor in colors and layer order.
Trace bitmap images to vectors first, simplify paths, then set density. Export after preview confirms even coverage across the hoop.
Previewing the Design
Hit preview before exporting to catch jump stitches and order issues, saving hours of machine time. The preview panel in Inkscape with Ink/Stitch shows a realistic simulation of your embroidery design. This step reveals problems that could ruin a test run on fabric.
Imagine loading a scanned logo converted via trace bitmap into paths. The initial preview might display rotated text stitching out of order, causing messy threads. Adjusting stitch order in the objects panel fixes this instantly.
Common fixes include removing excessive trims between small objects and optimizing color sequence for fewer stops. Add registration marks as running stitches to align hoop placement perfectly. These tweaks ensure smooth production.
Switch to the preview mode and rotate the view to check Bezier curves and node alignments. Test density on fill stitches and satin stitches to avoid puckering. Export to PES or DST only after a clean preview run.
Case Study: Before and After Preview Fixes
A user imported a complex floral vector into Inkscape and applied auto tracing. The before preview showed jump stitches crisscrossing the hoop and poor path order, leading to tangled threads during simulation.
After fixes, stitch order was manually adjusted in the objects panel, moving fill stitches before satin outlines. Excessive trims were removed by merging nearby paths in the node editor, cutting thread changes by half visually.
Color sequence got optimized, grouping similar shades together for efficient embroidery machine runs. Registration marks were added as simple running stitch paths at corners. The after preview displayed a clean, professional design ready for export.
This case highlights how previewing transforms raw SVG paths into production-ready embroidery files. Always simulate in the software’s hoop view to mimic real stitching. Save iterations to compare before/after results easily.
Exporting to Embroidery Format
Go to Extensions > Ink/Stitch > Embroider to select PES or DST format, set the hoop size, and export with automatic tie-offs. This final step converts your Inkscape design into a usable embroidery file for machines. Preview the stitches in the panel before saving.
Name files clearly, such as floral_design.pes or logo_dst, to track versions easily. Use a dedicated folder like Embroidery_Projects on your desktop for organization. Include subfolders for hoop sizes or colors to stay efficient.
For USB transfer, copy the file to the root of a FAT32-formatted drive. Safely eject and insert into your embroidery machine. Test with a running stitch sample first to verify compatibility.
| Format | Export Command | Common Use |
|---|---|---|
| PES | Extensions > Ink/Stitch > Embroider > PES | Brother, Babylock machines |
| DST | Extensions > Ink/Stitch > Embroider > DST | Most industrial machines |
| EXP | Extensions > Ink/Stitch > Embroider > EXP | Janome, Elna models |
| JEF | Extensions > Ink/Stitch > Embroider > JEF | Janome, New Home |
Quick Reference Cheat Sheet
Access the Embroider panel via Extensions menu for one-click exports. Select PES for home machines or DST for commercial use. Adjust stitch density and enable auto tie-offs in settings.
Check stitch order in the preview to avoid jumps. Use the objects panel to finalize path effects like satin stitches. Save as SVG first for backups.
File Naming Conventions
Start names with project type, like shirt_logo_v1.pes, for quick identification. Add hoop size, such as 4x4_rose.dst. Avoid spaces; use underscores instead.
Version control with numbers, bird_01.jef to bird_05.jef. This keeps your embroidery designs organized across sessions.
Folder Organization Tips
Create a main Embroidery_Files folder with subfolders for vector images, SVGs, and final exports. Sort by machine type or fill stitches vs stroke stitches.
- SVGs: Original Inkscape files
- Exports: PES, DST outputs
- Previews: Stitch simulations
- Tests: Machine run samples
USB Transfer Protocol
Format USB to FAT32, avoiding exFAT for machine compatibility. Place files in root, not subfolders. Label drive as EMB for easy spotting.
Insert into machine, select file via test run mode. Run a small section to check bezier curves and node edits render correctly.
Ready to Avoid Pitfalls and Get Professional Results?
You’ve mastered the steps, now discover pitfalls destroying amateur conversions. Many designs fail due to overlooked errors in image prep and stitch settings. Avoid these to achieve professional embroidery results.
Imagine spending hours on a JPG to PES conversion only for it to bunch up on the machine. Common issues like poor stitch density or excess colors ruin the output. This section reveals fixes and software upgrades.
Ready to elevate your work? Teaser questions guide you: What if free tools like Inkscape limit complex gradients? How do pros handle 3D puff effects? Explore solutions with needlic.com for top software.
Urgency matters, as bad designs waste thread and time. Professional tools promise flawless auto-digitizing and machine compatibility. Transition now to expert strategies below.
What Are Common Mistakes in JPG to Embroidery Conversion?

Skipping image prep causes failed designs, here’s how to avoid the top mistakes. Start with background removal using trace bitmap in Inkscape for clean vectors. Prevention keeps paths sharp for embroidery.
#1 No background removal leaves messy edges. Use the objects panel to select and delete extras. #2 Wrong stitch density causes puckering, adjust in the stitch panel for balanced fill stitches.
#3 Ignoring underlay leads to poor registration. Add running stitch underlay first. #4 Poor registration shifts layers, preview stitch order to fix alignment on the hoop.
#5 Excessive colors overwhelm machines. Limit to five via the colors panel, simplify with node editor. Test run exports to DST format ensure smooth results.
Which Software Delivers the Best Digitizing Results?
Free tools break on complex designs, professional software handles gradients and 3D effects flawlessly. Choose based on your needs from these tiers. Each excels in converting JPG to embroidery files like PES or DST.
Free options include Inkscape with Ink/Stitch extension. It traces bitmaps to paths, applies satin stitches, and exports PES. Great for simple vectors but struggles with photos.
| Software | Key Features | Best For | Pros | Cons |
|---|---|---|---|---|
| Inkscape (Free) | Trace bitmap, bezier curves, node editor | Basic vectors | Cost-free, open paths | No auto-digitizing |
| Embrilliance (Mid-range) | Auto-digitizing, lettering, gradient fills | Home users | Easy hoop preview | Limited 3D |
| Wilcom Hatch (Pro) | Full auto, 3D puff, machine formats | Complex designs | Pro stitch order | Steeper curve |
| PE Design (Pro) | Lettering, fills, multi-hoop | Custom text | Intuitive panels | Fewer gradients |
Experts recommend upgrading for stroke stitches and fill precision. Test with a sample SVG for real results.
How Do Wilcom Hatch and PE Design Compare?
Wilcom’s auto-digitizing creates 3D puff effects while PE Design excels in lettering, detailed comparison inside. Both convert JPG images to pro embroidery files. Evaluate across key criteria for your workflow.
Use this matrix for side-by-side insights on features like gradient fills and machine compatibility.
| Criteria | Wilcom Hatch | PE Design |
|---|---|---|
| Auto-digitizing quality | Excellent, handles photos | Good for vectors |
| Lettering | Advanced fonts | Superior customization |
| Gradient fills | Seamless blends | Basic support |
| Machine compatibility | 100+ formats (PES, DST) | Brother/Babylock focus |
| Price | Higher investment | Mid-pro range |
| Learning curve | Moderate with tutorials | Beginner-friendly |
| Stitch order control | Auto-optimize | Manual tweaks |
| 3D effects | Puff, applique | Limited |
| Hoop preview | Multi-hoop | Single focus |
| Node editing | Precise bezier | Simple paths |
| Export options | All major | Core formats |
| Test run simulation | Realistic preview | Basic stitch view |
Real project tests show Wilcom faster for floral gradients, PE Design shines on monogram text. Pick based on your designs.
Why Choose High-Quality Professional Software?
Amateurs spend hours manually digitizing what pros auto-generate in minutes. Follow this commercial embroiderer’s story for real ROI. Upgrading transformed their workflow from free tools like Inkscape.
They switched to Wilcom Hatch, cutting design time with auto-digitizing. Complex JPGs to DST exports now feature perfect satin stitches and underlay. Quality jumped, reducing test runs.
Client retention grew as designs held up on hoops without puckering. Time savings allowed more orders, justifying the cost quickly. Calculate your own: estimate hours saved per project times your rate.
Practical perks include stitch order automation and gradient handling. No more node editing drudgery. Pros deliver consistent embroidery files for any machine.
Where to Buy Top Embroidery Software?
Get authentic Wilcom Hatch and PE Design licenses at needlic.com product category embroidery software, instant download with full support. Explore options for your skill level. Licensing is straightforward perpetual or subscription.
Look for bundles with extras like font packs for lettering. Customer support includes install guides and chat help. Many offer 30-day money-back guarantees for risk-free trials.
Installation is simple: download, run setup, import your SVG paths. Verify compatibility with your machine’s PES or DST format. Start with a test design in the preview panel.
Choose based on needs, like Embrilliance for mid-range or pro tools for fill stitches. Direct purchase ensures genuine software without piracy risks.
Frequently Asked Questions
How to Convert JPG to Embroidery File (Step-by-Step Guide) for Beginners?
The process of converting a JPG image to an embroidery file like DST, PES, or EXP involves using digitizing software to trace and convert the raster image into stitch patterns. Start by opening your JPG in software like Wilcom Hatch or PE Design, auto-digitize key elements, adjust stitch types, and export to your machine’s format. Our full How to Convert JPG to Embroidery File (Step-by-Step Guide) covers every detail for beginners.
What Are Common Embroidery File Formats When Converting JPG to Embroidery File?
Popular formats include DST (Tajima), PES (Brother/Babylock), and EXP (Melco). JPG is a raster image, while these are vector-based stitch files. In our How to Convert JPG to Embroidery File (Step-by-Step Guide), we explain how software like Wilcom Hatch converts JPG pixels into these precise embroidery formats.
Which Software is Best for How to Convert JPG to Embroidery File (Step-by-Step Guide)?
Top choices are Wilcom Hatch for professional results, PE Design for home users, and Embrilliance for affordability. These tools offer auto-digitizing to simplify converting JPG to DST/PES/EXP. Follow our How to Convert JPG to Embroidery File (Step-by-Step Guide) to pick and use the right one.
What Are Common Mistakes to Avoid in How to Convert JPG to Embroidery File (Step-by-Step Guide)?
Avoid low-resolution JPGs, skipping color reduction, or ignoring underlay stitches, which cause poor embroidery. Always preview and test stitch out. Our detailed How to Convert JPG to Embroidery File (Step-by-Step Guide) highlights these pitfalls with tips using Wilcom Hatch and PE Design.
Can Free Tools Handle How to Convert JPG to Embroidery File (Step-by-Step Guide)?
Free tools like Ink/Stitch exist but lack precision for complex designs. For quality results, use paid software like Wilcom Hatch. Check our How to Convert JPG to Embroidery File (Step-by-Step Guide) for free vs. pro comparisons and beginner-friendly steps.
How Long Does It Take to Learn How to Convert JPG to Embroidery File (Step-by-Step Guide)?
Beginners can master basics in 1-2 hours with guided software like PE Design. Practice with simple JPGs first. Our comprehensive How to Convert JPG to Embroidery File (Step-by-Step Guide) breaks it down into quick, actionable steps.