
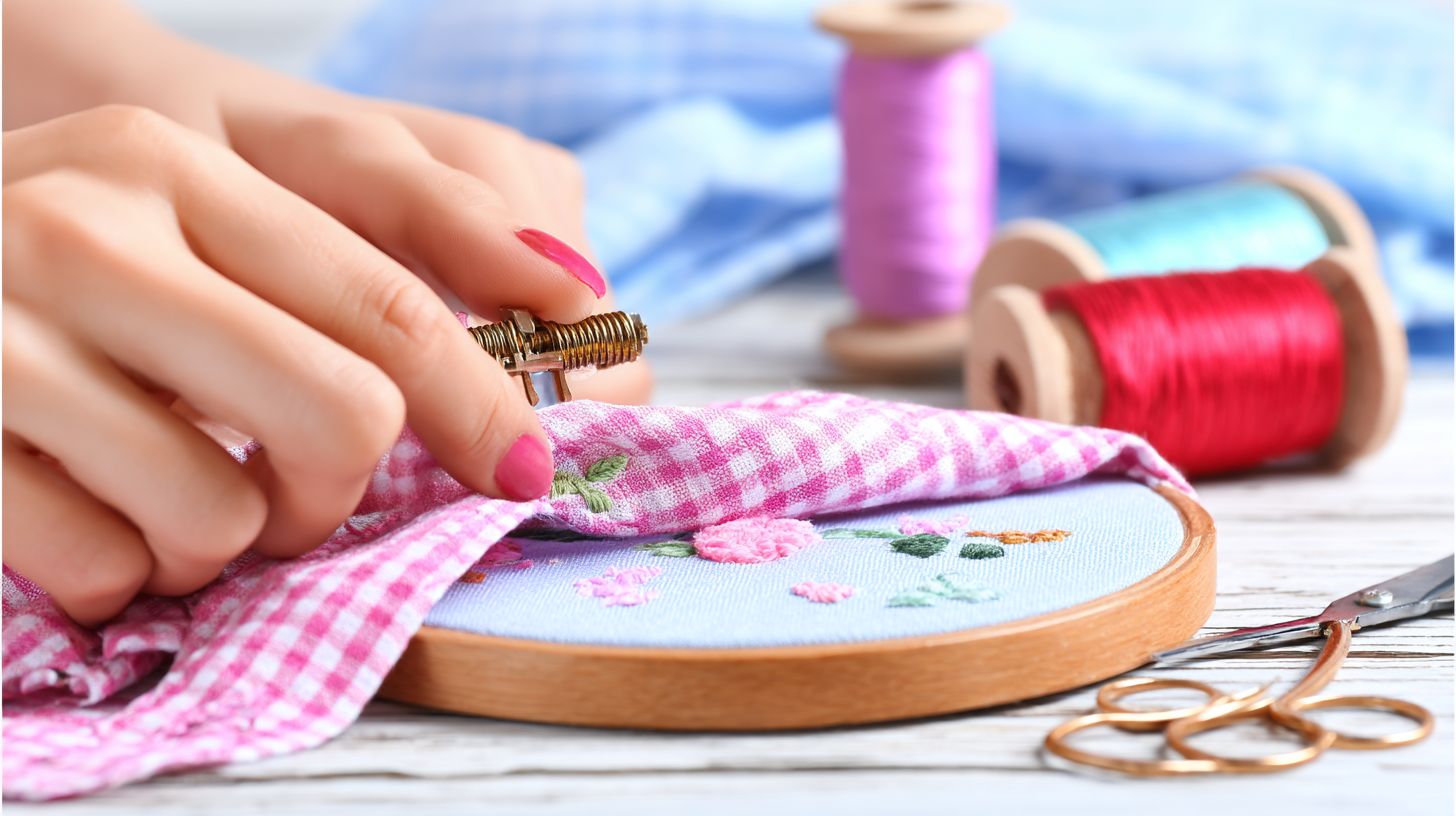
Frustrated with thread breaks halting your embroidery machine projects? Whether it’s the top thread snapping or bobbin thread failing at the needle eye, these issues plague beginners and pros alike.
This guide tackles common causes-from mechanical glitches to poor tension-and delivers step-by-step fixes. Learn to select Ricoma Embroidery needles and Robison-Anton Super Brite Polyester threads for flawless results.
Key Takeaways:
- Adjust machine tension properly: Start with upper thread at standard settings (4-6), then fine-tune bobbin tension using a screwdriver for balanced stitches, reducing breaks instantly.
- Match needle size to thread thickness-use 75/11 for fine threads, 90/14 for thicker ones-and replace dull or bent needles every 4-8 hours of use.
- Choose high-quality embroidery threads, store in cool dry places, and clean machine bobbin area regularly to prevent weakening and friction-related breaks.
What Causes Embroidery Thread Breaking?
Embroidery thread breaking disrupts projects and wastes time, often stemming from mechanical issues, poor thread quality, or improper tension settings on machines like Ricoma or Tajima.
Mechanical wear, such as burrs on needle plate, shreds the top thread during stitching. Thread defects like weak polyester thread snap under tension discs pressure.
Tension mismatches cause false breaks or pop outs, where the bobbin thread pulls out unexpectedly. These primary causes affect stitch formation across embroidery machines.
Users on forums like Embroidery Library often trace breaks to these factors. Next sections break down mechanical issues, thread quality problems, and tension roles without listing fixes.
Common Mechanical Issues Leading to Breaks
Mechanical problems like burrs on the needle plate or misaligned rotary hook account for many thread breaks in Ricoma and Tajima embroidery machines.
Burrs needle cause thread shredding, with symptoms like inconsistent breaks on the needle eye or thread path. Inspect with a magnifying glass for rough edges on the needle plate or bobbin case.
- Rotary hook timing off leads to clean breaks, felt as sudden top thread snaps during high-speed runs.
- Picker arm misalignment triggers pop outs, where thread lifts from the hook.
- Thread sensor false triggers halt stitching on PR600 Brother machines.
Quick visual checks reveal these in common failures. Look for wear on the take-up lever, sewing arm, or presser foot during machine maintenance.
Thread Quality and Material Problems
Low-quality threads like cheap cotton or old metallic thread weaken under embroidery machine tension, leading to frequent breaks during high-speed stitching.
Inferior polyester thread frays at the needle eye, especially non-premium brands. Visual inspection before loading shows thin spots or fuzziness along the thread length.
- Rayon thread absorbs humidity, causing false breaks in damp storage.
- 40wt thread mismatch with needle size leads to shredding on thick fabrics.
- Cotton thread lacks strength for machine embroidery tension.
Experts recommend thread storage with humidity control and pairing titanium needles to needle size. Check garment stability and stabilizer backing to avoid added stress on poor threads.
Quick Fixes for Thread Breaking During Embroidery
Stop thread breaks mid-project with these immediate fixes targeting tension and threading, restoring smooth machine embroidery on Ricoma or Brother PR600 in under 5 minutes.
These no-tools-needed actions address most interruptions by fixing top thread path issues and thread tension imbalances. Re-threading the full path from spool to take-up lever often resolves improper threading that causes breaks. Users report quick recovery for polyester thread or rayon thread shredding.
Quick fixes work by restoring stitch formation without deep machine maintenance. Check bobbin thread pull and needle eye first to prevent pop outs or thread shredding. This keeps fabric hooped projects like garments stable.
Focus on tension discs and presser foot clearance for fast results. Avoid common errors like skipping the rotary hook area. These steps minimize downtime during embroidery sessions.
Immediate Tension Adjustments
Quick tension tweaks using the I test can resolve thread breaks by balancing top thread and bobbin thread pull.
Perform these steps for fast relief from false breaks or clean breaks. Start with the tension test to check balance in under 2 minutes.
- Do the I test: pull the top thread gently to lift the bobbin thread 1-2 inches from the bobbin case.
- Adjust tension discs clockwise for loose top thread, using a 1/4 turn maximum.
- Test on scrap fabric for even loops under the needle plate.
- Avoid over-tightening to prevent pop outs or skipped stitches.
A common mistake is ignoring the bobbin side, which affects hook timing. For 40wt thread on titanium needles, fine-tune top tension after hooping. This restores smooth runs on multi-needle machines.
Basic Needle and Thread Checks
A bent titanium needle or skipped thread path causes instant breaks; inspect in 30 seconds to resume embroidery.
These checks target needle scarf damage and burrs needle issues common in high-speed machine embroidery. Complete the process in 1 minute for pre-wound bobbins or magnetic bobbins.
- Check needle scarf for bends; replace if visibly off straight.
- Run your finger along the needle eye for burrs or nicks.
- Re-thread the full thread path from spool to take-up lever.
- Verify thread passes smoothly through tension discs and under presser foot.
A frequent error is missing the hook under the presser foot, leading to thread sensor trips. Use proper needle size for metallic thread or cotton thread. Pair with stabilizer backing for garment stability and fewer interruptions.
How to Adjust Machine Tension Properly
Proper tension adjustment ensures balanced stitch formation, preventing thread breaks on embroidery machines like Bernina 770QE or Ricoma. The top thread pulls at 40-60g through tension discs, while bobbin thread holds at 80-100g from the bobbin case. Improper settings often lead to thread shredding or pop outs near the needle eye.
Testing remains key before every project. Run a tension test on scrap fabric hooped with stabilizer backing to check stitch quality. This simple step avoids false breaks from improper threading or burrs on the needle plate.
Experts recommend starting with manufacturer defaults, then fine-tune for thread quality like polyester or rayon. Watch for clean breaks at the rotary hook or take-up lever. Consistent machine maintenance, including oiling schedule, supports even tension across the thread path.
Humidity control and proper thread storage prevent weak spots. Use titanium needles with correct needle size for your fabric. Adjust for garment stability on knits versus wovens to minimize issues like thread sensor trips.
Upper Thread Tension Settings
Upper thread tension controls top thread pull through tension discs, ideal at 40-60 grams for 40wt polyester on most machines. Set the dial to 4-6 for rayon thread, following Ricoma standards. This prevents excessive drag causing breaks near the presser foot.
- Perform the thread lift test: pull top thread for 1.5 inch bobbin rise.
- Loosen slightly for knits to avoid puckering on the sewing arm.
- Sew a tension test square on hooped fabric; inspect back for even loops.
Takes just 3 minutes, yet fixes most top tension problems. Avoid settings over 7 for metallic thread, which shreds easily. Check the needle scarf for burrs during inspection.
For multi-needle machines like Tajima, test each color change. Pair with correct needle eye size to reduce friction. Stable stitch formation follows balanced pull against bobbin tension.
Bobbin Tension Fine-Tuning
Bobbin tension at 80-100g prevents loose stitches; use pre-wound magnetic bobbins for consistent pull in Tajima machines. It balances the top thread for smooth rotary hook interaction. Too loose leads to pop outs; too tight causes shredding at the picker arm.
- Remove the bobbin case and check screw tightness.
- Turn 1/4 out for polyester thread; tighter for cotton thread.
- Fill with Super Brite thread and test pull: it unravels slowly with resistance.
Common mistake is over-tightening for cotton, causing clean breaks. Ensure Organ needles compatibility to avoid hook timing issues. Magnetic bobbins maintain even tension without manual tweaks.
Recheck after every bobbin change, especially with varying thread quality. Inspect for burr inspection on the needle plate. Proper tuning stops machine embroidery interruptions from false breaks or thread path snarls.
Best Needle Types and Sizes for Different Threads
Selecting titanium-coated needles matched to thread prevents shredding, with Organ needles lasting 5x longer in high-volume embroidery. Use sizes 75/11 to 100/16 for 40wt threads to avoid thread breaks from mismatch. A wrong size creates excess friction at the needle eye and thread path.
Proper needle choice reduces top thread and bobbin thread issues in your embroidery machine. Titanium coatings cut down on thread shredding during dense stitching. Match groove size to thread thickness for smooth passage through tension discs.
Start with 80/12 needles for standard polyester work. Test on scrap fabric to check stitch formation. This setup minimizes false breaks and pop outs near the rotary hook.
Experts recommend inspecting needle plate and bobbin case alongside needle swaps. Combine with thread tension checks using an I test. Good matches boost machine embroidery reliability on hooped garments.
Matching Needles to Thread Thickness
Use 80/12 titanium needles for 40wt polyester to minimize friction at needle eye. The groove must match thread diameter for clean pulls through the take-up lever. This prevents thread breaks in high-speed runs.
| Thread Type | Recommended Size | Examples | Best For |
|---|---|---|---|
| Polyester 40wt | 80/12 | Organ | Ricoma machines, general use |
| Rayon | 90/14 | Titanium-coated | Dense designs, logos |
| Metallic | 75/11 | Ballpoint | Delicate fabrics, specialty |
Rayon threads need larger grooves to avoid shredding on presser foot passes. Metallic threads pair with ballpoint tips to glide over stabilizer backing. Always verify garment stability before full runs.
Test top tension after changes. Watch for clean breaks versus thread lift issues at the sewing arm. Proper matching supports consistent bobbin thread flow.
When to Replace Bent or Dull Needles
Replace needles after 8-10 hours of embroidery or if burr inspection shows wear. Dull points snag polyester thread and rayon thread in the thread path. Bent needles disrupt hook timing and cause skipped stitches.
- Visual check for bends in needle scarf.
- Touch test for dull point feel.
- Stitch test reveals skipped stitches or loops.
- Replace every 1 million stitches or sooner.
A Brother Innovis skips with dull 90/14 needles on cotton thread. Run a tension test post-replacement. Fresh needles improve stitch formation across designs.
Combine with machine maintenance like oiling schedule and thread sensor cleans. Check picker arm for residue. This cuts thread breaks from wear on pre-wound bobbins or magnetic bobbins.
Thread Selection and Preparation Tips
Choosing Robison-Anton or Super Brite Polyester threads reduces breaks compared to generics. Branded threads meet Coats Group standards for consistent denier, which helps prevent thread breaks during machine embroidery. Proper preparation avoids weakening that leads to issues like top thread or bobbin thread snapping.
Focus on polyester thread for durability over rayon thread or cotton thread. Prep steps include checking for thread quality and storing correctly to maintain strength. This approach minimizes false breaks, clean breaks, and pop outs on machines like Ricoma.
Experts recommend testing 40wt thread with your needle size and tension discs. Wind bobbins carefully to avoid thread shredding from improper threading. These habits support smooth stitch formation and reduce downtime.
Incorporate pre-wound bobbins or magnetic bobbins for consistency. Always inspect the thread path, needle eye, and burrs needle before starting. Preparation ties directly into reliable embroidery machine performance.
Choosing High-Quality Embroidery Threads
Opt for Super Brite Polyester 40wt from Robison-Anton for vibrant colors and break resistance on Ricoma machines. High-quality threads resist UV resistance and pass wash tests over many cycles. They outperform generics in thread tension stability.
Compare options using these criteria:
| Brand | Type | Break Strength | Cost/m |
|---|---|---|---|
| Robison-Anton | Poly | 500g | $8 |
| Sulky | Rayon | 450g | $10 |
Polyester thread suits most projects due to its strength against top tension issues. Avoid metallic thread unless tested, as it prone to shredding near the rotary hook.
Test with a tension test or I test on scrap fabric. Pair with titanium needles matching your needle scarf and needle plate. This ensures clean stitch formation without thread sensor triggers.
Proper Thread Storage to Prevent Weakening
Store threads at 40-60% humidity to avoid strength loss in rayon thread. Keep in airtight containers to protect from dust and moisture. This prevents thread weakening that causes breaks at the take-up lever or presser foot.
Follow these storage tips:
- Use 65 degreesF room temperature for stability.
- Position vertical spools off the floor to avoid tension damage.
- Avoid sunlight exposure, which fades Super Brite colors and reduces durability.
- In dry climates like California USA, use humidors for humidity control.
Check bobbin case and picker arm threads during storage reviews. Rotate stock to use oldest first, maintaining thread quality. Proper habits support machine maintenance and oiling schedule.
Combine with stabilizer backing and garment stability for full prevention. Inspect for burr inspection before use. This keeps hook timing and sewing arm running smoothly without thread lift problems.
Machine Maintenance to Stop Thread Breaks
Regular maintenance on embroidery machines like PR600 Brother cuts breaks significantly. An oiling schedule every 10 hours prevents rotary hook drag and keeps the machine running smoothly. This simple habit addresses common causes of thread breaks during machine embroidery.
Clean the bobbin case and hook area weekly to remove lint buildup. Lint causes drag on bobbin thread, leading to pop outs and false breaks. Proper care ensures smooth stitch formation and reduces thread shredding.
Lubricate moving parts like the take-up lever and picker arm on schedule. Use quality machine oil sparingly to avoid slips from over-oiling. This maintenance supports top thread and bottom thread tension balance.
Inspect for burrs on the needle plate and hook timing issues regularly. Combine with thread path checks and tension discs cleaning for fewer interruptions. Well-maintained machines handle polyester thread, rayon thread, and metallic thread reliably.
Cleaning the Bobbin Case and Hook Area

Lint in bobbin case causes many intermittent thread breaks; clean weekly. Built-up lint drags on bobbin thread, especially with pre-wound bobbins or magnetic bobbins. Regular cleaning keeps the rotary hook spinning freely.
Follow these steps for quick maintenance:
- Remove the bobbin case carefully.
- Brush lint from the hook area with a soft brush.
- Wipe needle plate burrs with a lint-free cloth.
- Vacuum the sewing arm for deeper cleaning.
Use compressed air for hard-to-reach spots; it takes about five minutes. This prevents clean breaks near the needle eye or needle scarf. Test with a tension test afterward to confirm smooth operation.
For machines like Brother PR600, focus on the presser foot area too. Clean after every 10 hours of use to maintain thread sensor accuracy and avoid improper threading issues. Pair with fabric hooping checks for best results.
Lubricating Moving Parts Correctly
Oil take-up lever every 10 hours with 2 drops of machine oil. Proper lubrication reduces friction on tension discs and top tension areas. This stops thread breaks from dry parts during long sessions.
Stick to this schedule: daily for the hook, weekly for the lever. Follow these steps to lubricate safely:
- Unthread the machine completely.
- Apply oil to five key points, including rotary hook and picker arm.
- Run the machine empty for five minutes.
- Wipe away excess oil to prevent slips.
Avoid over-oiling, as it causes thread slips and poor stitch formation. Use oil suited for embroidery machines, not sewing machine alternatives. This maintains hook timing and supports 40wt thread or titanium needles.
Check garment stability and stabilizer backing after oiling. Combine with burr inspection and thread storage in low humidity control for complete care. Experts recommend this routine for fewer interruptions with cotton thread or needle size changes.
Design and Hooping Techniques That Prevent Breaks
Proper hooping with HoopTalent station ensures even tension, slashing breaks on unstable garments. Dense designs overload thread, while stable hooping keeps fabric taut. Focus on these techniques to cut down on thread breaks during machine embroidery.
Start by checking your embroidery design for heavy stitch areas that strain the top thread and bobbin thread. Use software to lighten fills and satins. Pair this with tight hooping to avoid pop outs and thread shredding.
Garment stability matters most on knits or stretch fabrics. Stabilizer backing and even tension prevent puckering that leads to clean breaks. Test your setup with a tension test before full runs.
Experts recommend combining thread quality checks with these methods. Store thread in low humidity control to avoid weak spots. This approach boosts stitch formation and machine reliability.
Avoiding Dense Stitches and Jump Stitches
Limit underlay to 0.5mm and reduce satin width to prevent thread overload. Dense stitches jam the needle eye and rotary hook, causing breaks. Keep fill under 0.4 stitches per mm for smooth runs.
Turn on auto underlay for jump stitches to secure threads. Add 0.2mm pull compensation in software like Needlic to handle fabric pull. This stops false breaks from loose jumps.
- Scan designs for high-density fills before loading.
- Use titanium needles sized right for your 40wt thread, like polyester or rayon.
- Check thread path and tension discs after adjustments.
Run an I test on scrap fabric to verify top tension. Watch for burrs on the needle plate or bobbin case. These tweaks keep the take-up lever and presser foot working without snags.
Proper Fabric Hooping for Even Tension
Use MaggieFrame with tear-away stabilizer for wrinkle-free hooping on knits. This method floats backing to avoid pulling fabric unevenly. It prevents puckering breaks from loose areas.
- Place stabilizer backing under fabric, then position in hoop.
- Align with HoopTalent guides for straight edges.
- Tug fabric even around all sides before tightening.
- Test by pulling gently; fabric should not shift.
For garments, hoop two layers if needed for garment stability. Avoid over-tightening, which stresses thread sensor and picker arm. Check hook timing if breaks persist post-hooping.
Inspect for burr inspection on hoop edges or sewing arm. Use pre-wound bobbins or magnetic bobbins for consistent bobbin thread. Follow an oiling schedule and machine maintenance to support even fabric hooped runs.
How Does Embroidery Software Fix Thread Breaks?
Embroidery software tackles thread breaks by automating adjustments that prevent common issues like thread stress and improper tension. Professional tools analyze designs to optimize stitch paths and densities, reducing strain on the top thread and bobbin thread.
These programs simulate embroidery on virtual machines, spotting problems before they reach your embroidery machine. They adjust for needle eye friction and thread path issues automatically.
By integrating with machines, software ensures smooth stitch formation, minimizing false breaks and pop outs. This leads to reliable runs on garments with proper fabric hooping and stabilizer backing.
Users report fewer interruptions with features like pull compensation, making it easier to handle tricky threads such as metallic thread or polyester thread. Professional embroidery software like Needlic automatically adjusts stitch density to eliminate thread stress.
Optimizing Stitch Density Automatically
Auto-optimize reduces density by 20% under jump stitches, preventing breaks. This feature scans designs for overly tight areas that cause thread shredding or snaps near the rotary hook.
Software applies true-type sizing to scale fonts without packing stitches too closely. It also adds pull compensation to counter fabric stretch, keeping top tension even.
Underlay auto places stabilizing layers first, supporting dense fills on stretchy fabrics. For example, it converts dense fills to 0.3mm spacing, easing stress on titanium needles and take-up lever.
Needlic integration lets you preview changes on your machine setup, testing for burrs needle or hook timing issues. Pair this with machine maintenance like oiling schedule and tension test for best results on 40wt thread or pre-wound bobbins.
Troubleshooting Persistent Thread Breaking Issues
Persistent breaks signal deeper issues; follow this checklist for Ricoma or Tajima machines. A systematic diagnostic approach resolves most cases quickly. Start with simple checks before advancing to complex ones.
Common culprits include improper threading, tension problems, or worn parts like needle burrs. Test on scrap fabric first to isolate the cause. This method saves time and prevents further damage to your embroidery machine.
Focus on thread path, top tension, and hook timing for clean results. Use quality polyester thread or rayon thread to avoid thread shredding. Regular machine maintenance keeps issues at bay.
Expect results in under 30 minutes with patience. Address false breaks from sensors or pop outs from loose hooping. Experts recommend checking garment stability and stabilizer backing too.
Step-by-Step Diagnostic Checklist
Start with threading, end with timing for full diag. This 15-minute process covers key areas like thread path and tension discs. Use titanium needles for tough fabrics during tests.
- Thread path verification: Check five points. Ensure top thread flows smoothly from spool through tension discs, take-up lever, needle eye, and presser foot. Look for twists or snags causing thread breaks.
- Tension I test: Hoop stable fabric with stabilizer backing. Sew a straight line, lift to check stitch formation. Adjust top thread and bobbin thread if loops appear on top or bottom.
- Needle burrs inspection: Remove needle, feel for burrs on needle scarf or eye. Replace with correct needle size for your 40wt thread. Run finger along needle plate for roughness.
- Hook timing adjustment: Set to 0.5mm gap between rotary hook and needle scarf. Check bobbin case for pre-wound bobbins or magnetic bobbins. Mis-timing causes clean breaks.
- Sensor reset: Power off, reset thread sensor and picker arm. Clear false breaks from dust. Test with cotton thread or metallic thread to confirm.
After checklist, run a full design on hooped fabric. Monitor for thread lift or sewing arm issues. Maintain thread storage in low humidity control to prevent breaks.
Advanced Tips for Professional Embroidery Results
Pro tips like speed slowdowns boost quality on Bernina 770QE machines. Fine-tune your embroidery machine settings for zero breaks at 1000 SPM. These adjustments minimize thread breaks and ensure smooth runs with tricky threads.
Experts recommend pairing thread tension tweaks with speed controls. Use titanium needles for metallic or polyester thread to cut down on shredding. Regular machine maintenance like burr inspection keeps the needle eye and rotary hook clear.
Focus on proper threading through the tension discs and take-up lever. Test with an I test to check top thread and bobbin thread balance. This setup delivers clean breaks and pro-level stitch formation.
Control humidity in your sewing area and store thread properly. Hoop fabric tightly with stabilizer backing for garment stability. These steps prevent pop outs and false breaks during long designs.
Speed Settings and Slow-Down Trims
Set 800 SPM max for metallic thread, slow 50% at trims. This prevents thread shredding on high-speed fills. Adjust your embroidery machine to match thread type and design elements.
Configure speeds for different stitch types: trims at 400 SPM, turns at 600 SPM, fills at 1000 SPM. Access these in your machine’s settings menu under speed controls. Save presets for metallic thread, polyester, or rayon to avoid constant tweaks.
- Enter the speed adjustment screen on your machine.
- Set trim speed to 400 SPM for clean stops.
- Raise to 600 SPM for turns, max 1000 for fills.
- Test on scrap fabric to confirm zero false breaks.
Pro results show zero false breaks with these settings. Pair with thread sensor activation to pause on issues. Inspect the bobbin case and needle plate before runs for smooth operation.
Frequently Asked Questions
How to fix embroidery thread breaking issues caused by wrong tension?
One of the top reasons for how to fix embroidery thread breaking issues is incorrect tension settings on your machine. Here’s a simple step-by-step guide for beginners:
- Check your machine’s manual for recommended tension settings for your thread type.
- Loosen the tension slightly if the thread snaps at the needle-test on scrap fabric.
- Tighten if the thread bunches up on the fabric underside.
- Run a test stitch and adjust in small increments until smooth.
Proper tension prevents breaks and ensures clean stitches every time.
How to fix embroidery thread breaking issues from dull needles?
Dull or bent needles are a common culprit in how to fix embroidery thread breaking issues. Follow these easy steps:
- Inspect your needle for bends, dull tips, or residue buildup.
- Replace with a new needle matching your fabric and thread size (e.g., 75/11 for cotton).
- Install correctly, ensuring it’s straight and secure.
- Stitch a sample to verify-no more snapping!
Change needles every 8-10 hours of embroidery for best results.
How to fix embroidery thread breaking issues due to cheap thread quality?
Low-quality thread frays easily, leading to how to fix embroidery thread breaking issues. Here’s how to solve it:
- Switch to high-quality polyester or rayon embroidery thread from reputable brands.
- Store thread away from sunlight and humidity to prevent weakening.
- Wind bobbins slowly and evenly to avoid over-twisting.
- Test on scrap fabric before your main project.
Investing in good thread saves time and frustration.
How to fix embroidery thread breaking issues with improper threading?
Misthreaded machines cause frequent breaks when learning how to fix embroidery thread breaking issues. Fix it step-by-step:
- Turn off and unplug your machine for safety.
- Follow the threading path exactly as shown in the manual, from spool to needle.
- Ensure the presser foot is up during threading to release tension disks.
- Re-thread the bobbin case if using a top-loading machine.
- Test stitch slowly to confirm smooth flow.
Double-check threading before every session-it’s a game-changer!
How to fix embroidery thread breaking issues from high embroidery speeds?
Running your machine too fast often leads to how to fix embroidery thread breaking issues. Adjust like this:
- Lower the speed setting to 600-800 SPM (stitches per minute) for starters.
- Monitor the first few stitches and gradually increase if stable.
- Use professional embroidery software like Needlic to optimize designs for your machine’s speed.
- Avoid dense designs at max speed to prevent overload.
Slower speeds build confidence and reduce breakage.
How to fix embroidery thread breaking issues in dense design areas?
Dense stitches overload thread, causing breaks in how to fix embroidery thread breaking issues. Try these fixes:
- Edit designs in embroidery software to reduce density or add underlay stitches.
- Hoop fabric tightly and use stabilizer (cut-away for heavy designs).
- Increase stitch length slightly in software settings.
- Embroider in sections if the design is very complex.
Professional tools make design tweaks effortless for flawless results.
Ready to eliminate embroidery headaches for good? Upgrade to professional embroidery software at Needlic.com. Ditch free tools for premium features that deliver better quality designs, faster stitching, and zero thread breaks-perfect for beginners and pros!
🚀 Upgrade Your Embroidery Workflow
Stop wasting time with low-quality tools. Use professional software for better results.